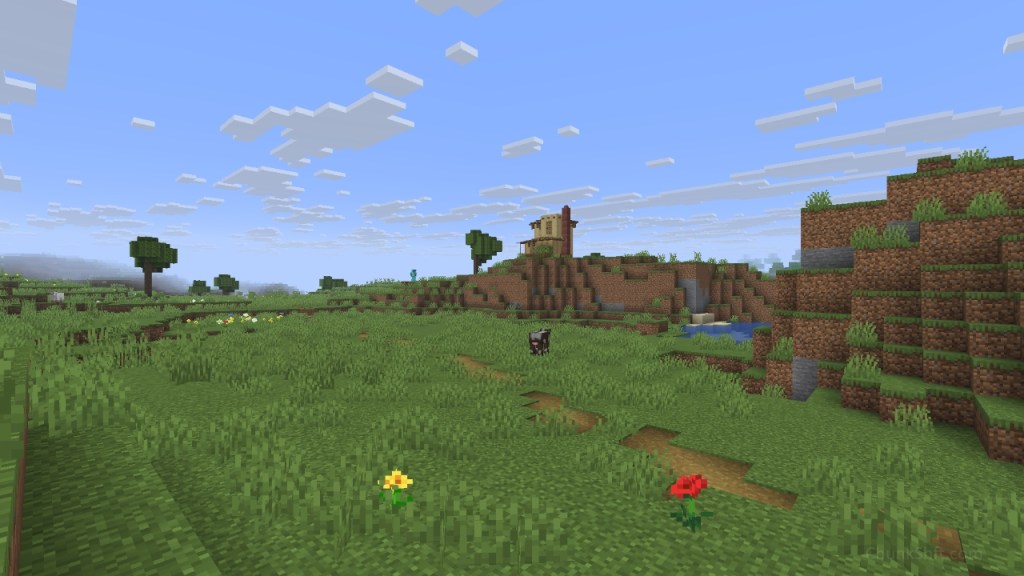
Towards the end of 2025 I had a thought. How small could I comfortably build?
This post offers my most detailed tutorial to date. It’s a small build with materials accessible in the early game.
Inspiration for building smaller
This post was inspired by small Lego sets. Sets that communicate a concept without a lot of blocks and don’t break the bank. The quick and easy assembly leave plenty of time for interaction. With less of the story told, your imagination has more space to play.
Exploring smaller builds appealed to me for a couple reasons. First, I like the idea of story telling without saying every word. Taking the time to understand what makes the mind identify something and focusing on the key points and dropping what doesn’t explicitly tell the story.
Second, is build time. Supporting early game or players looking to build things without a lot of time. Getting a build done creates an opportunity for interaction. A platform to build off of and create other ideas. Motivating you to interact rather than intimidating you with a list of unfinished tasks.
Whether it’s your only house or a structure used as part of a larger project. Having some well thought out smaller builds in your toolkit is the goal here.
Deciding where to build
If you’ve been following my blog, you’ll notice I decided on a new area for this build. I chose a new location so that the smaller build scale didn’t seem out of place.
While I’m excited for this experiment, I do foresee a drawback to building at this size. Sometimes you need bigger builds for functionality; especially if you play this game a lot (redstone contraptions, storage systems, farms).
I do believe building at the 1 chunk scale is best for most builds, balancing time commitment and practicality. In the future I’d like to find a way to mix these scales together.
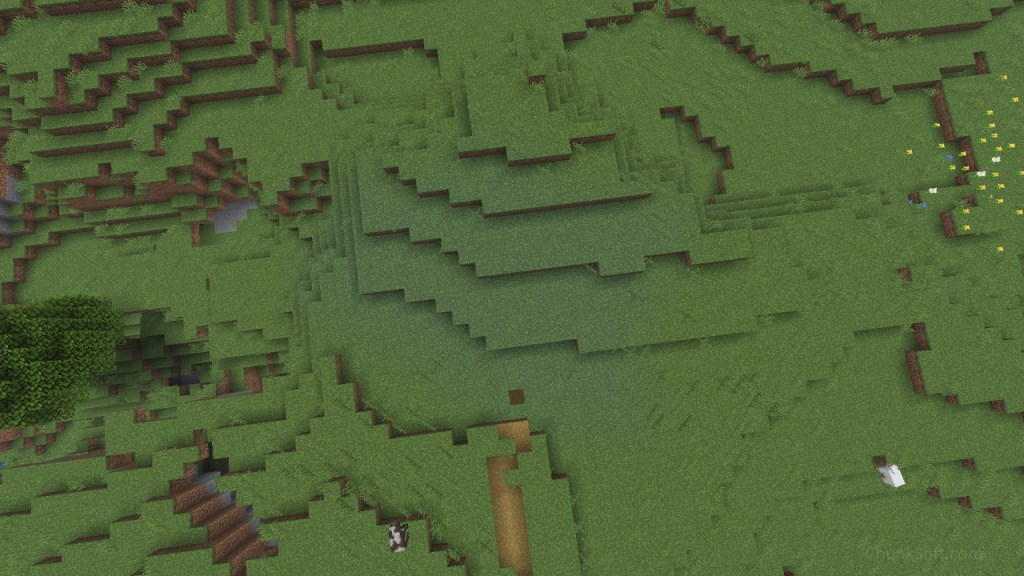
So why did I decide to build here? The blueish grass above is a river, a future location of a squid farm. While moving to a new area my seem against my ethos; this unique location offers time saveing benefits.
Block by block tutorial
This is a new approach for me. My “tutorials” have been more general guides. Let me know your thoughts in the comments.
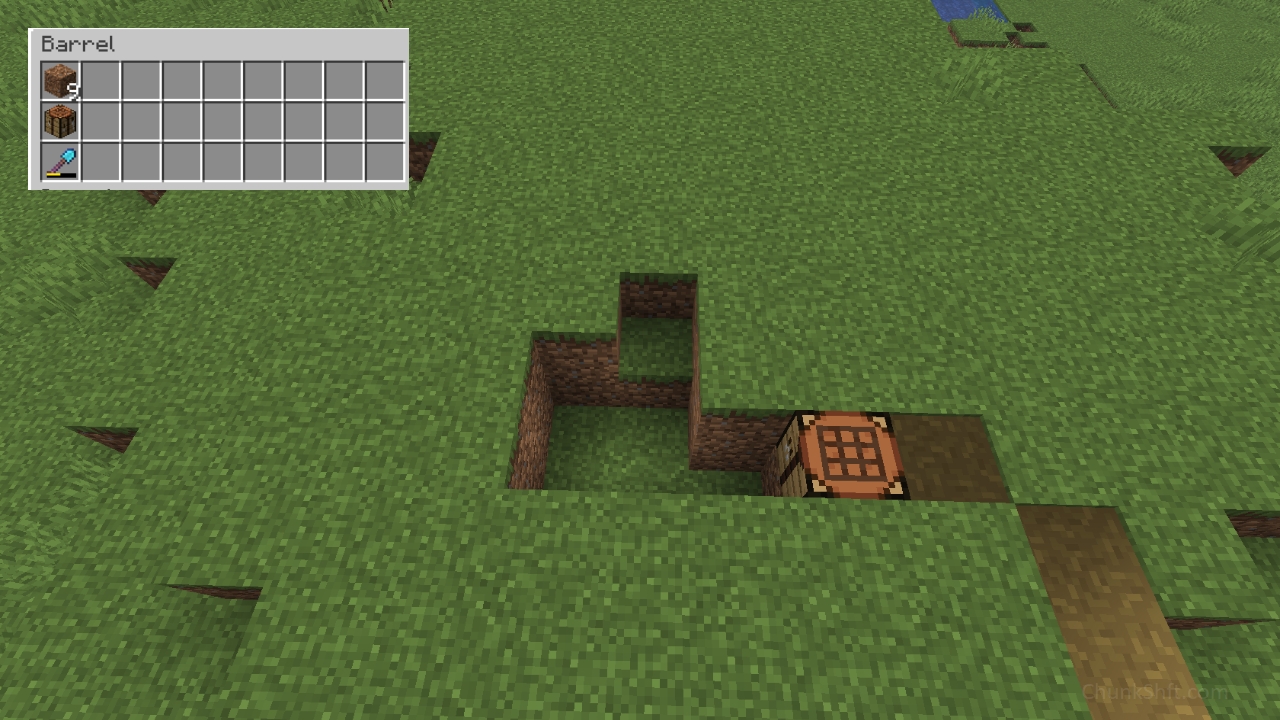
Inventory: dirt if you need to level land. A crafting table and a shovel. 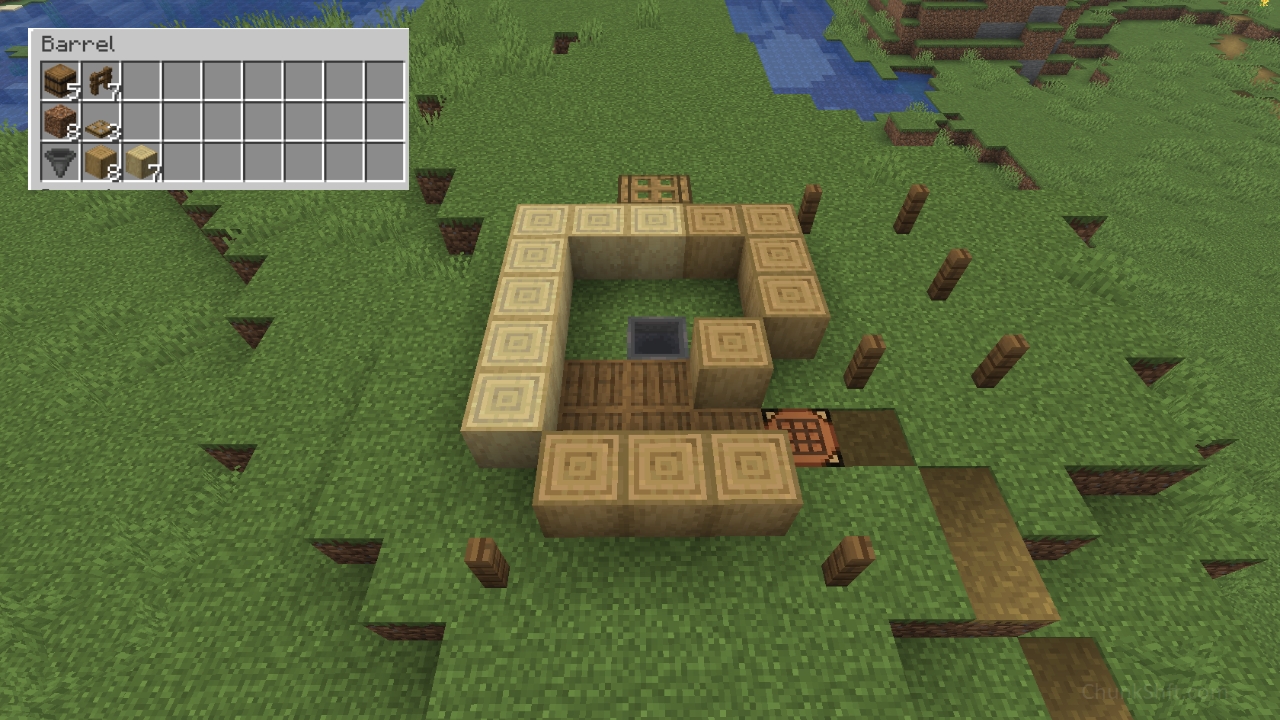
Inventory: 5 barrels, 7 oak fence posts, 5 dirt (fill the space under barrels once placed), 3 oak trap doors, 1 hopper, 8 stripped oak logs and 7 stripped birch logs. 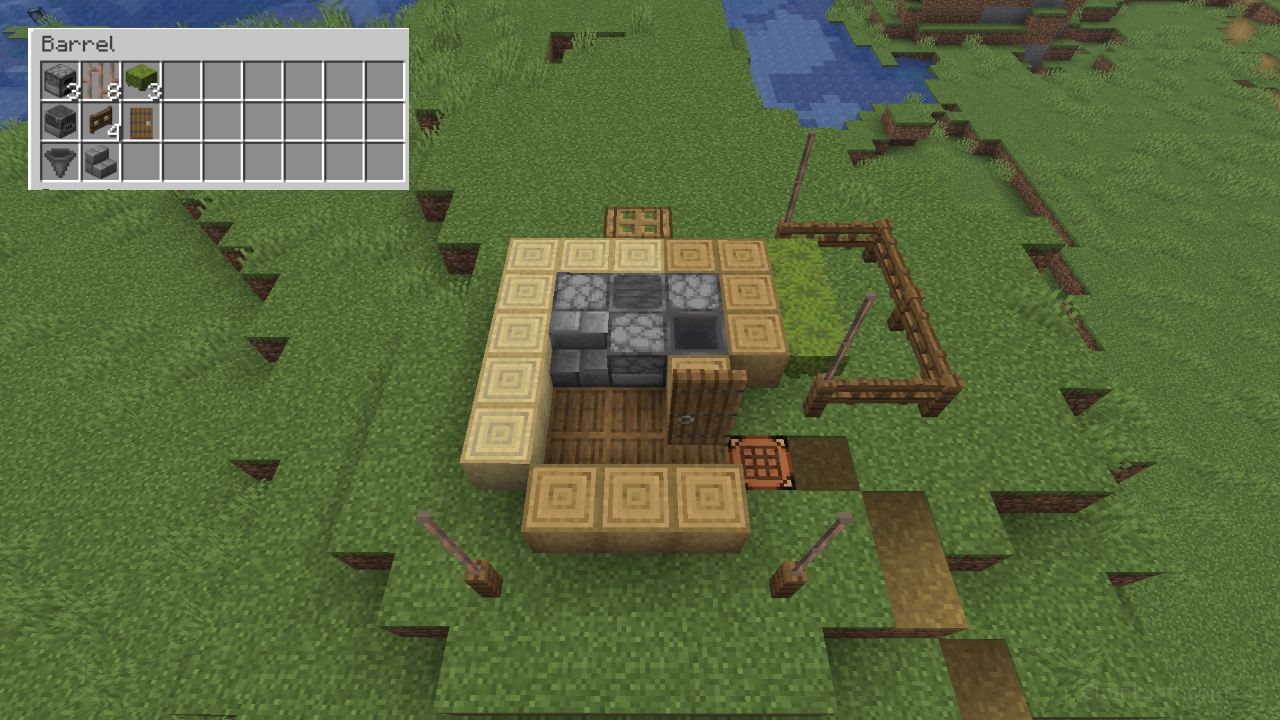
Inventory: 3 furnaces, 8 waxed exposed copper bars, 3 azalea bushes, 1 blast furnace, 4 spruce fence gates, 1 spruce door, 1 hopper and 1 stone brick stair. 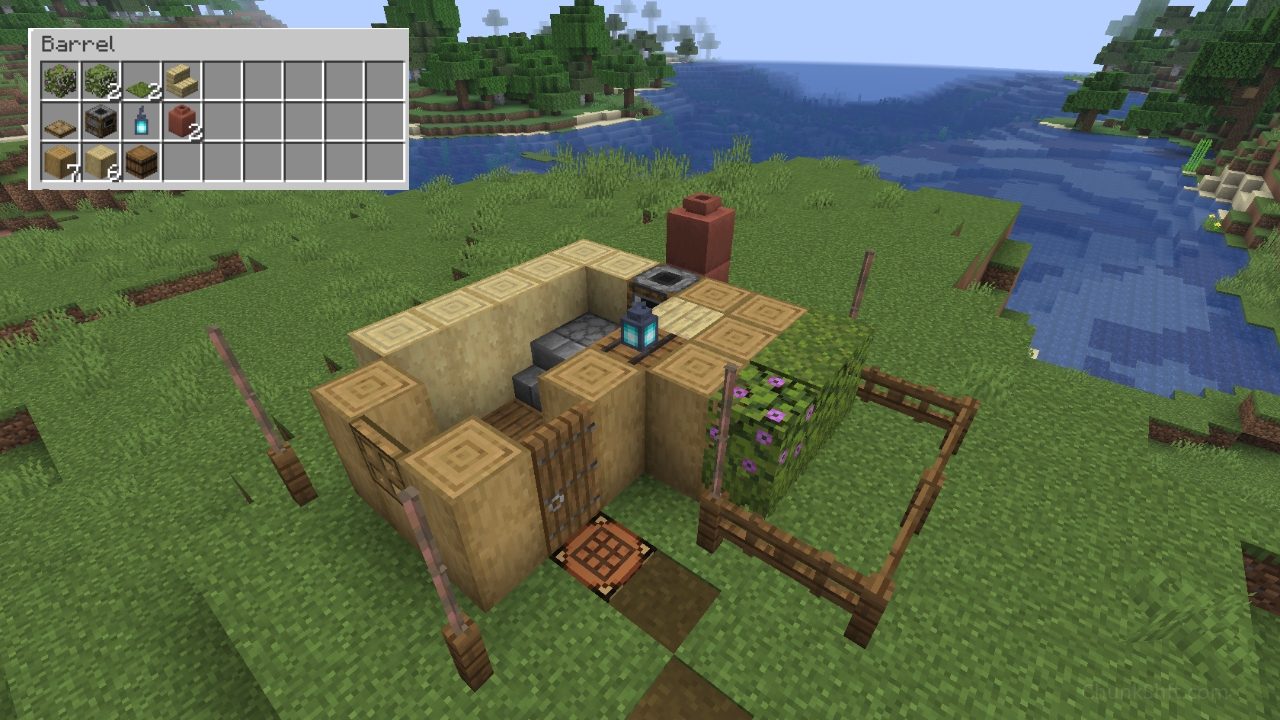
Inventory: 1 flowering azalea leaves, 2 azalea leaves, 2 moss carpets, 1 birch stair, 1 oak trapdoor, 1 smoker, 1 soul lantern, 2 decorated pots, 7 stripped oak logs, 6 stripped birch logs and 1 barrel. 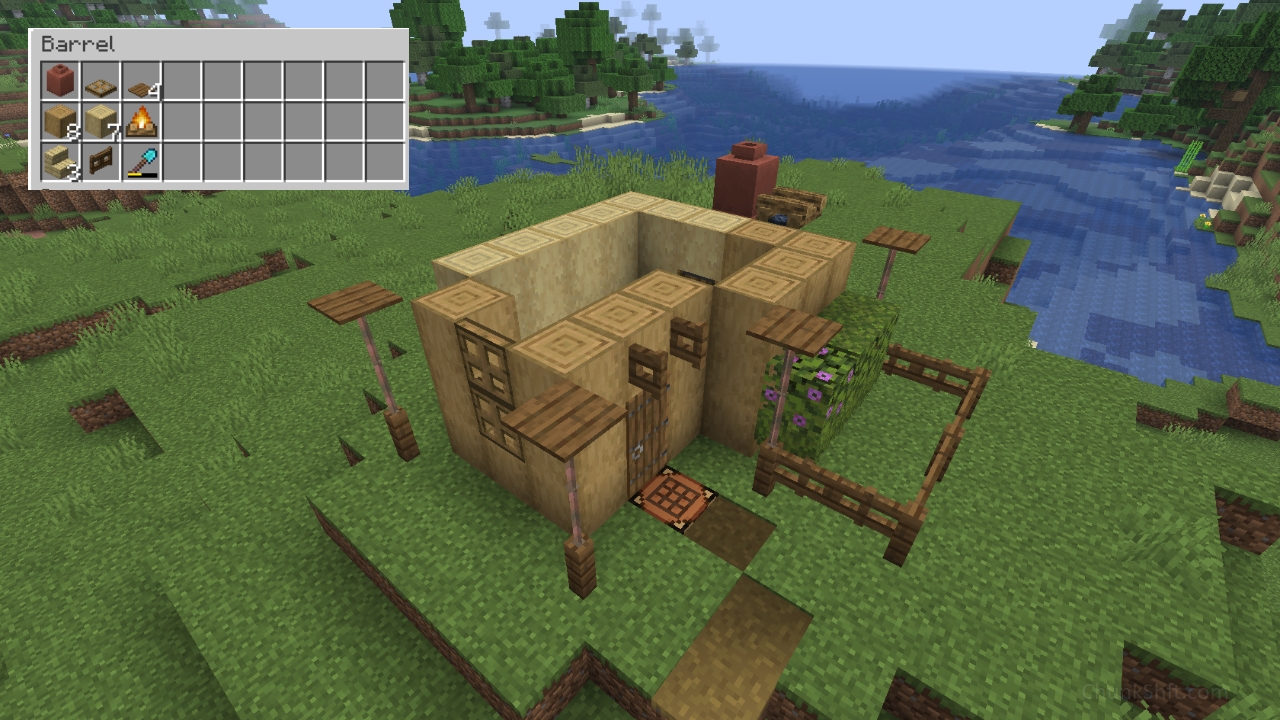
Inventory: 1 decorated pot, 1 oak trapdoor, 4 spruce pressure plates, 8 stripped oak logs, 7 stripped birch logs, 1 campfire, 3 birch stairs, 1 spruce gate and a shovel. 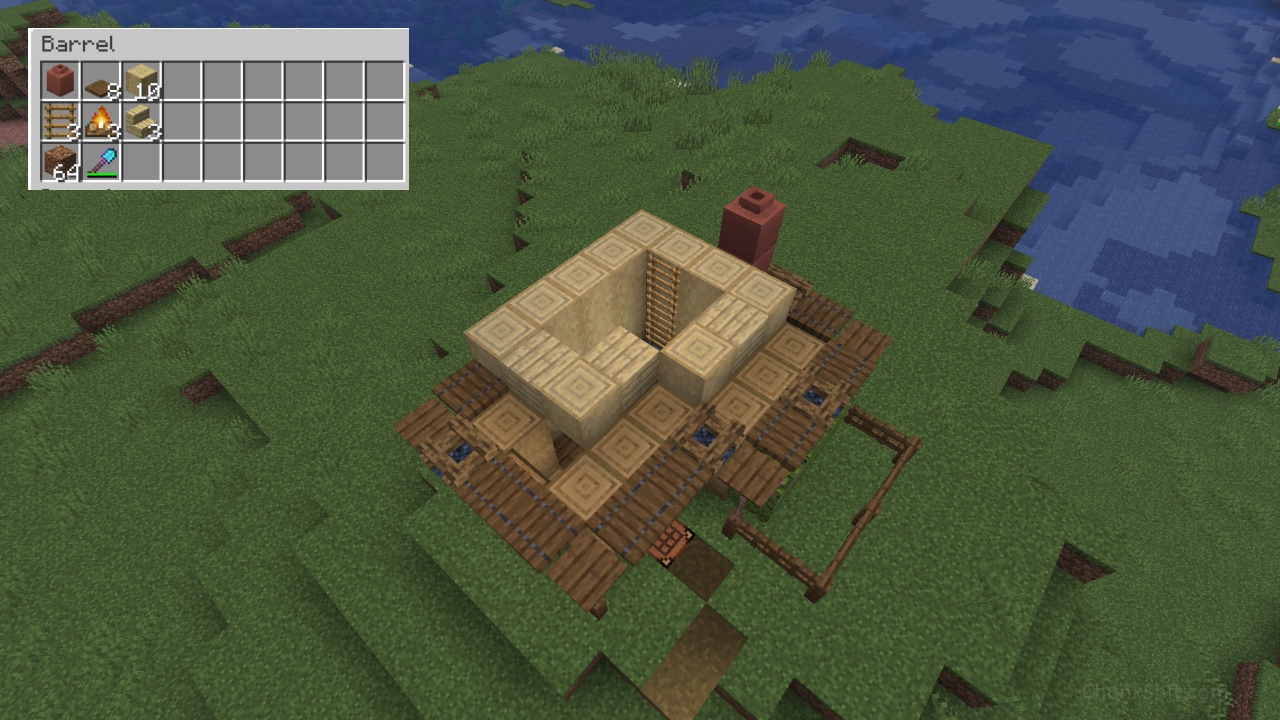
Inventory: 1 decorated pot, 8 spruce trapdoors, 10 stripped birch logs, 3 ladders, 3 campfires, 3 birch stairs, dirt (helper block) and a shovel. 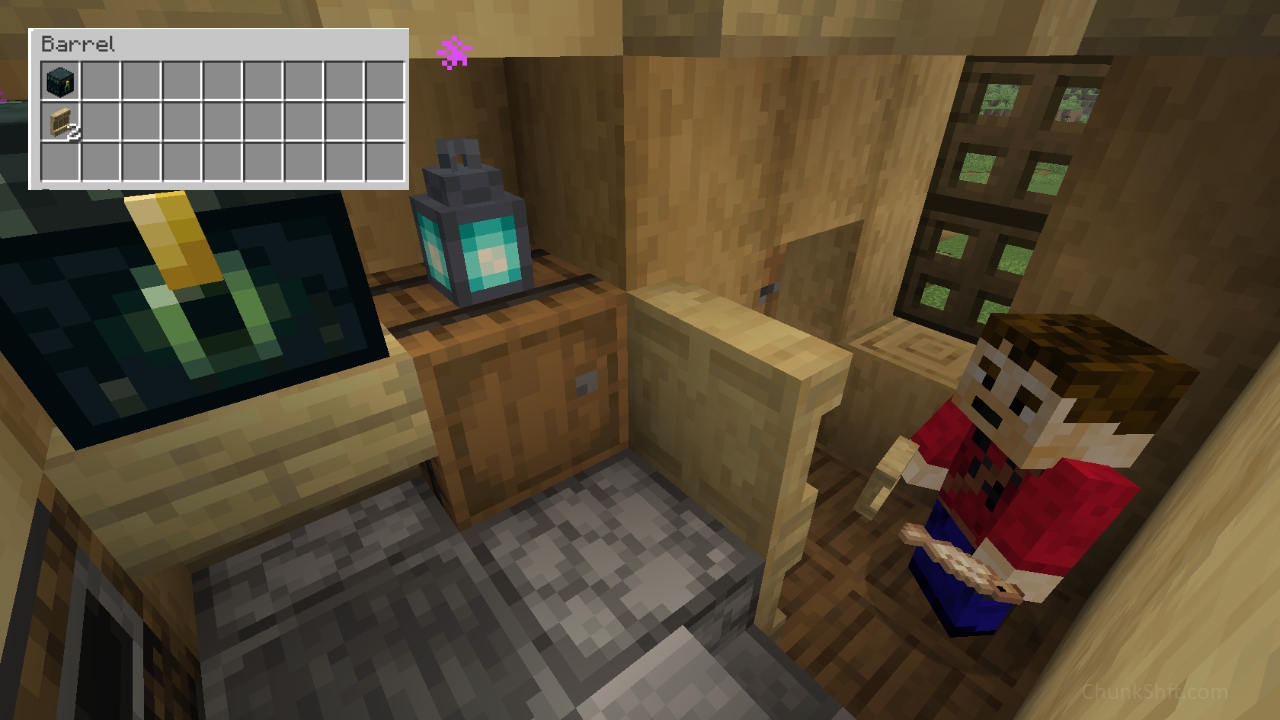
Inventory: 1 ender chest and 2 birch wood shelves. 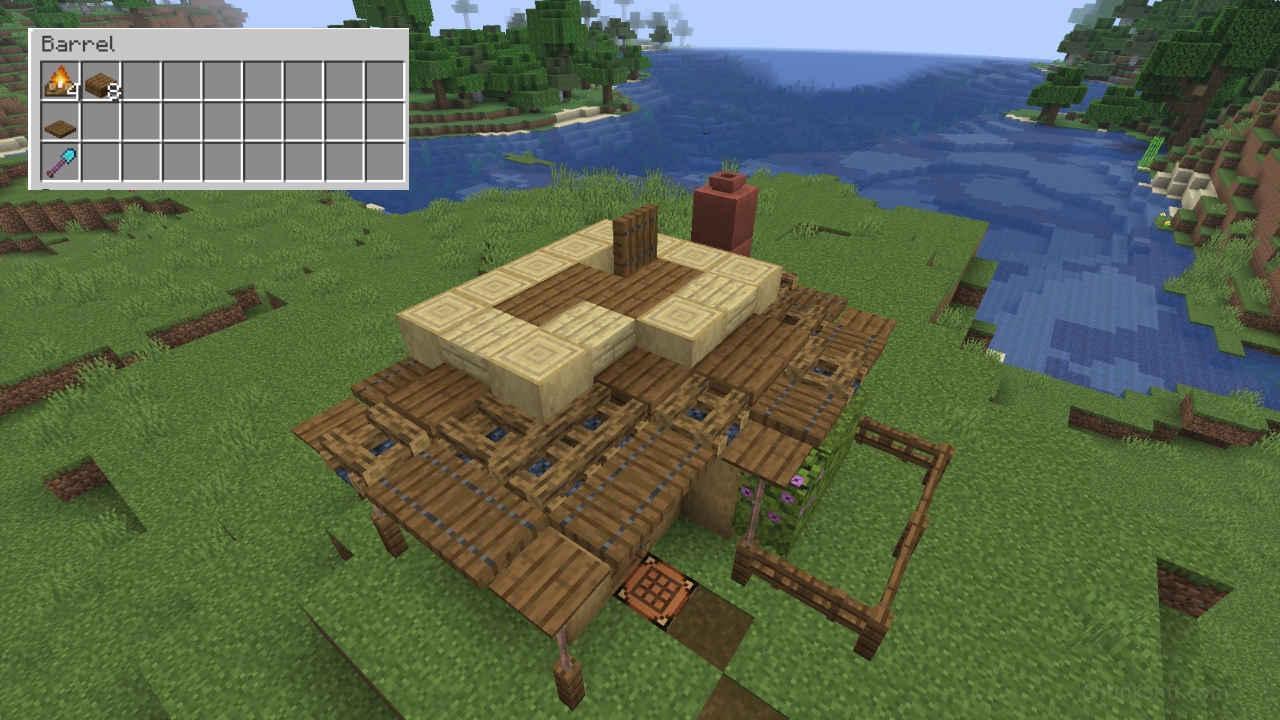
Inventory: 4 campfires, 8 spruce slabs, 1 spruce trapdoor and a shovel. 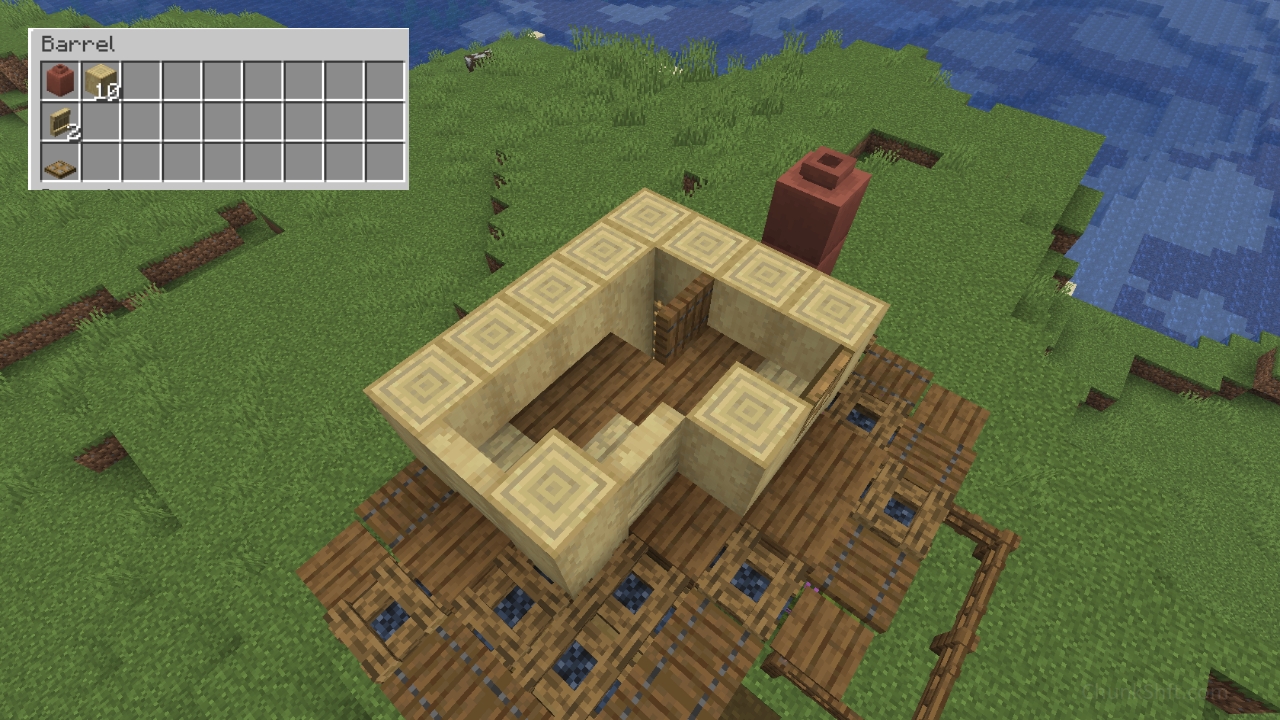
Inventory: 1 decorated pot, 10 stripped birch log, 2 birch shelves and 1 oak trapdoor 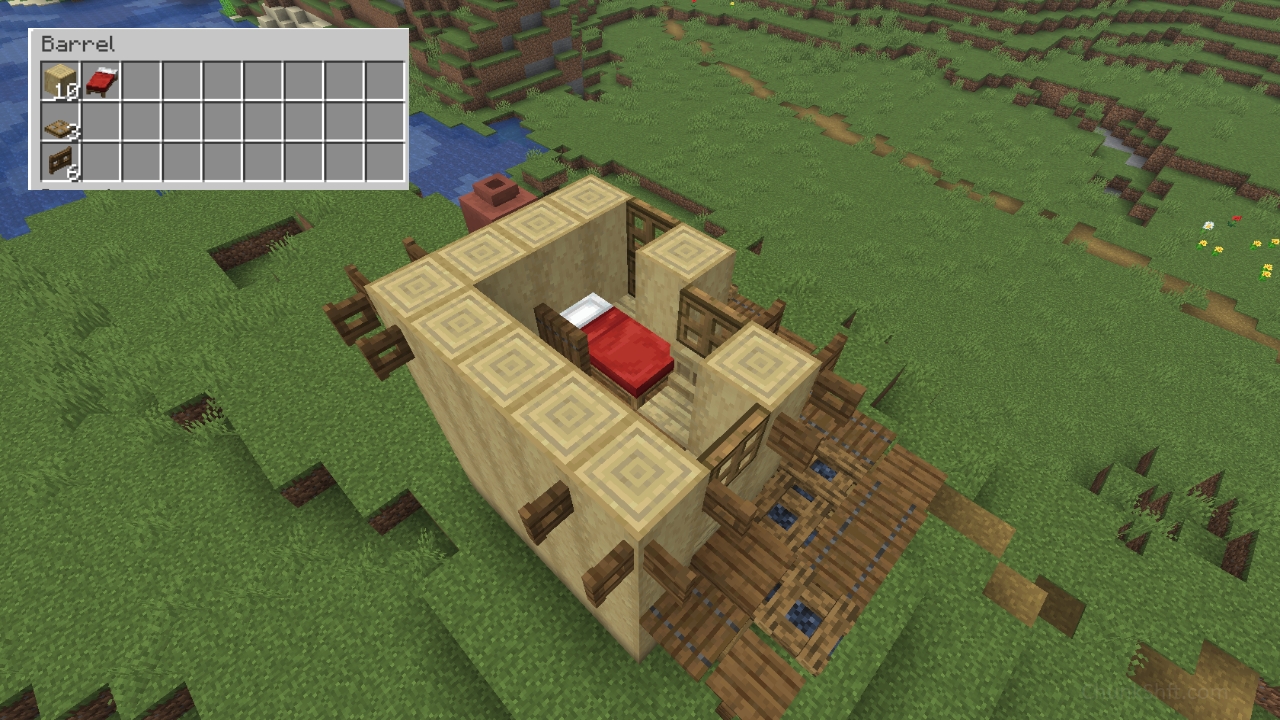
Inventory: 10 stripped oak logs, 1 bed, 3 oak trapdoors and 6 spruce fence gates. 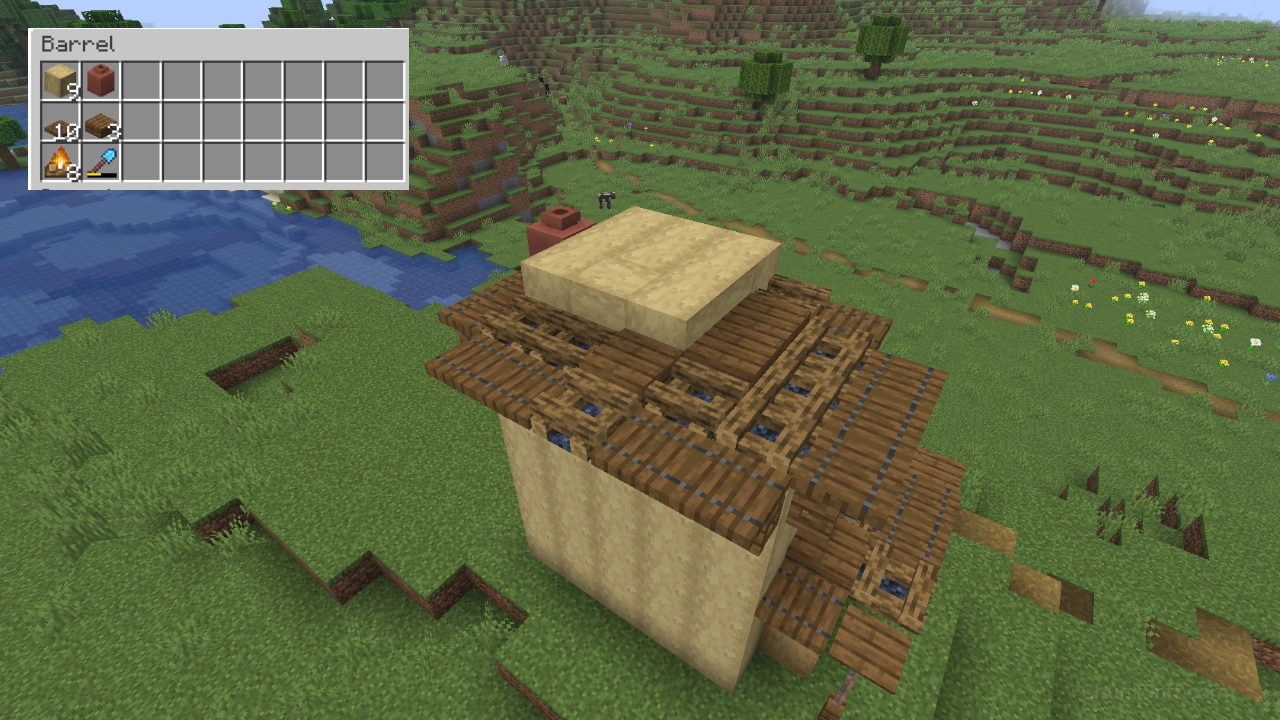
Inventory: 9 oak logs, 1 decorated pot, 10 Spruce trapdoors, 3 spruce slabs, 8 campfires and a shovel. 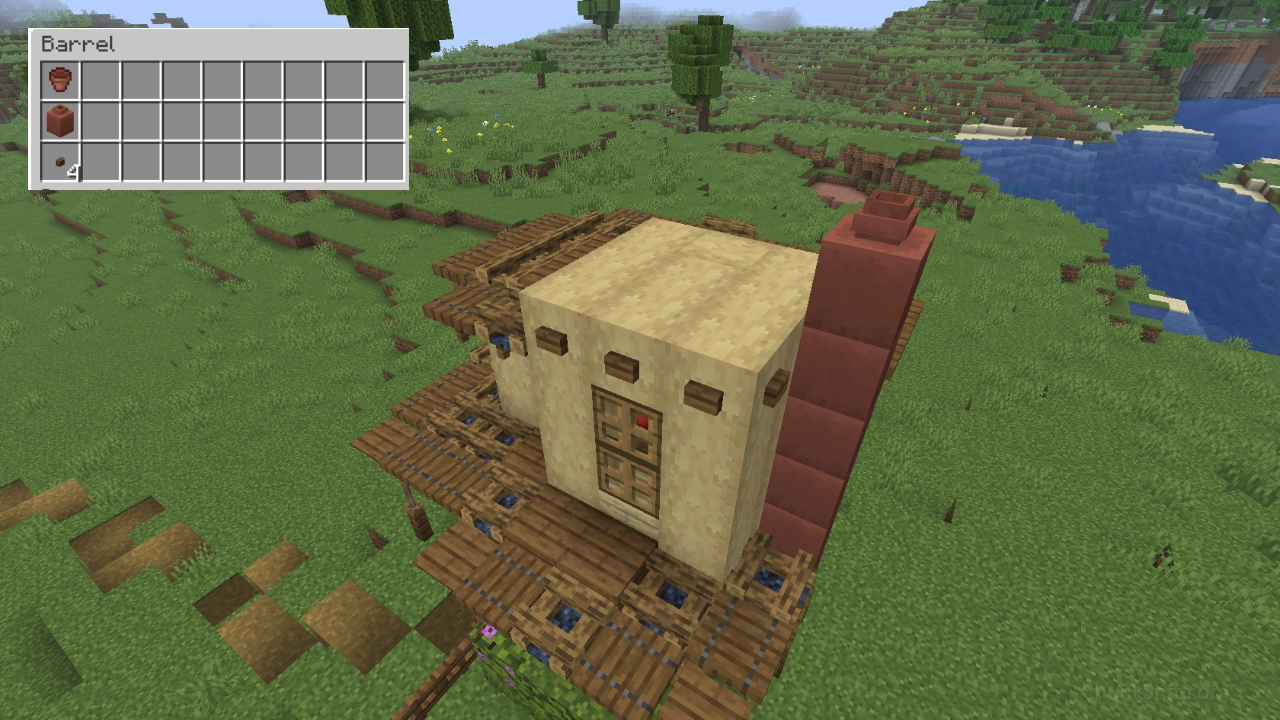
Inventory, 2 clay pot, 1 decorated pot and 4 spruce buttons.
3 Tips for your Minecraft builds
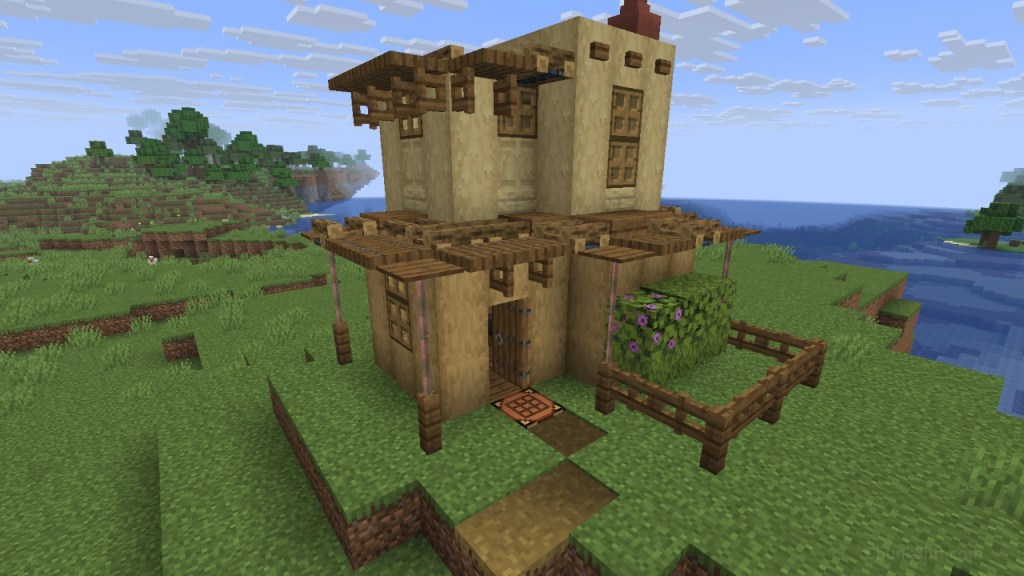
I decided to lean into a style I’ve been building with in my main area. A town that I add to every 500 days as a museum.
This style lends itself to smaller builds. The larger fantasy roofs of medieval Minecraft builds need a little more room. With that, my first tip:
1. Choose a style that works
Squared off shapes, mildly sloped roofs, low contrast pallets and wooden accents to add detail. All these things make the “Masia” and “Pueblo Reviva” styles a great option for smaller builds.

Interesting shapes can be built without taking up big spaces. Simple square or rectangular windows can be 1×1, 1×2 or 2×2 rather than the large spaces curved or fancier windows would require.
Many block palettes of low contrast are available in colours that match this style. The low contrast palettes allow for extra small details (trap doors, buttons, slabs) and a wide variety of colours provide options.
2. Low slope roofs
Those low slope roofs opens up an interesting block combination for roofs. Slabs, camp fires, trap doors and pressure pates allow for a gentle slope with a lot of texture.
This creates a very busy roof, but busy roofs are visually acceptable. And the low contrast of stripped logs (when compares to tuff) keeps things from becoming overwhelming.
3. Incorporate functional blocks into the structure.
I have been using crating tables as door mats on a lot of my builds. Moving inside upside down barrels give storage. The floor on the elevated aide is furnaces. I was even able to sneak an auto furnace in.
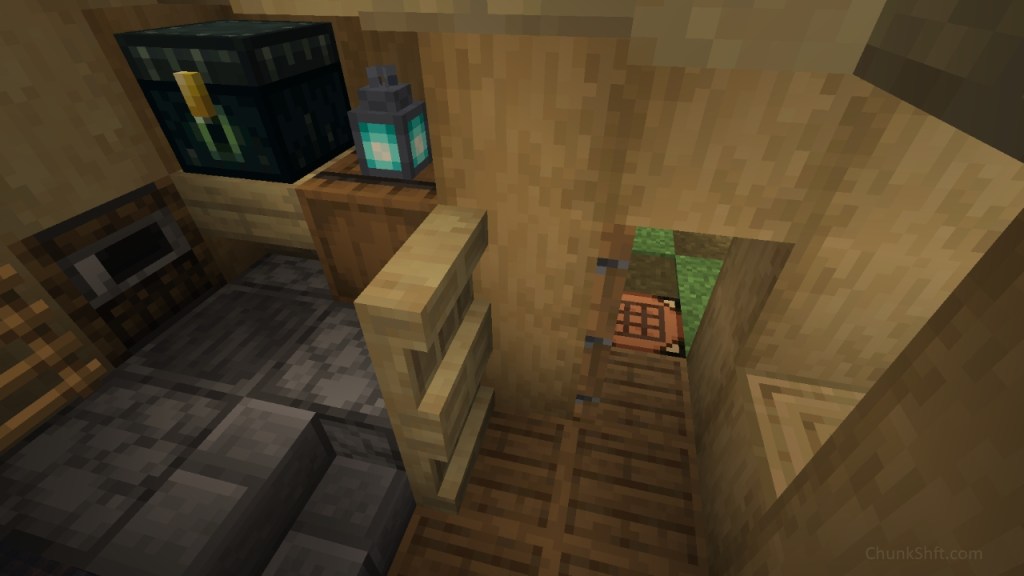
When building this small the interior gets tight. You may only get a couple functional blocks into the space. Incorporating these blocks into the structure expands details and functionality.
Wrap up
This is a new format. I really want to offer a tutorial that helps readers build smaller without compromising looks.
Mega builds are cool and give a lot of space for details. Building small can take more thought to get right. But something like this could be built in an hour or two if you have the blocks.
Let me know in the comments if this helped you or what would improve the tutorial!
Build stats
Real Life Days: 2
Minecraft Days: ?? (didn’t record properly but it wasn’t many)
Hours: 3.3
This build was a 1 chunk build, if you’d like to see more 1 chunk builds click here.

Leave a comment